|
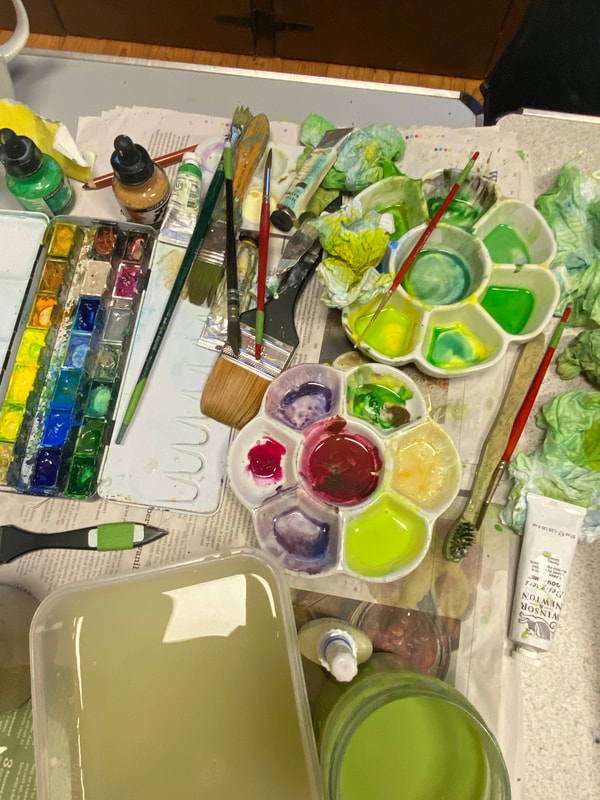
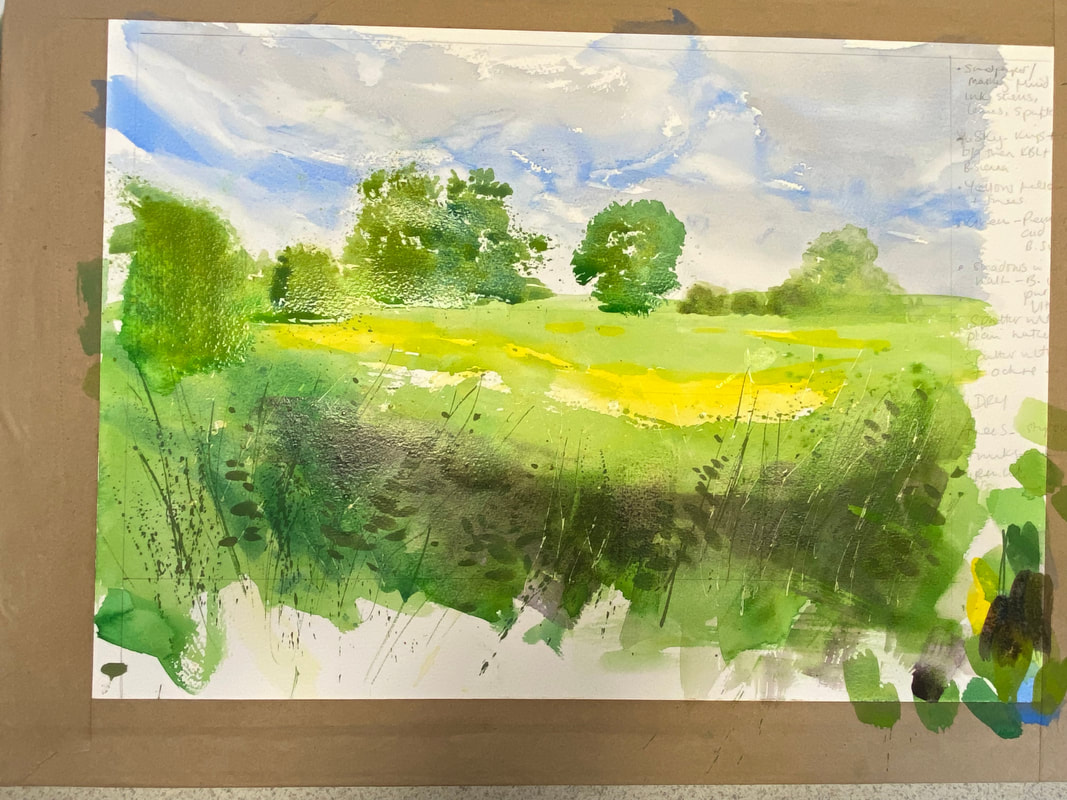
A look back at Kate Wade’s demo for Lacock Art Group Kate is a Wiltshire based landscape artist who specialises in watercolour and gouache, and who also uses acrylic inks, acrylics and oils in her paintings to convey certain characteristics to best effect. She finds inspiration for her work from nature, the countryside and coast, which offer a never-ending variation of colours, patterns and textures through the four seasons. You can see Kate’s work in an exhibition at The Corsham Gallery, in Corsham, Wiltshire, until 28 August. We were very pleased to welcome Kate at the end of May to give an insight into her approach to painting along with some tips about how to apply her technique into our own artwork. Kate used a reference photo taken of Avebury earlier in May, which Kate calls the ‘fluffy month in the countryside. The scene is of distant trees and hedgerows, beyond a bright yellow field in the middle ground, and a dense bank of foliage (grasses, nettles, cow parsley) in the foreground. Her style is very loose and tends to feature fresh, bright colours. Getting started Her ‘go to’ paper is 300g/m2 Bockingford stretched NOT (cold pressed) paper. For the demo Kate uses half a full sheet of this paper, taped to a board. She prefers Jackson’s Art Supplies own brand paint of watercolour paint or Windsor & Newton’s Professional series, and tends to use flat paint brushes. Kate starts off by drawing a light sketch, placing the horizon centrally on the paper – there are no rules, she says. Initially she focuses on the foreground, aiming to put texture here, using masking fluid to block off twigs and other foliage, preparing the base for further layers of paint to give the impression of masses of leaves. Next she spatters masking fluid with an old toothbrush, using a very light touch. Trying not to overdo the cow parsley. The applicator for the masking fluid (which has a small pipette able to mask off quite fine lines) is from Jackson’s Art. After this she moves to the sky and before approaching the bottom half of the painting. Sky and foreground Tackling the sky is always a bit scary, acknowledged Kate; it was comforting to hear that even accomplished, professional artists also find this rather daunting at times. Using a range of different blues, beginning with Cobalt Blue for the stream of blue sky among the clouds, followed by Kings Blue Light, Kate then adds another shade of blue. She softens the edges of the clouds for variation and darkens this with Burnt Sienna, running it into the Cobalt and dabbing with tissue paper to soften it. Generally Kate paints her skies wet on dry, preferring a bit more control over the paint than you get with wet on wet. Now Kate moves to work on the foreground, putting in some acrylic ink, which is waterproof, to represent grasses and leaves. She builds up foliage of nettles etc in layers, making grassy lines with a rigger brush, getting movement into them, mixing Yellow Ochre with Emerald Green. Using a small squirrel mop she makes nettle shapes on the grass before laying a wash. Fields and distant trees Kate next turns her attention to the fields in the middle ground of the composition, first applying yellow, the lighter, brighter colour, to avoid it getting lost. Starting with Cad Yellow Light plus a bit of Indian Yellow (a very intense colour) out of tube to warm it up. She takes yellow over the grassy areas as the undertone and adds yellow to where trees will be on the horizon to give them a little light. Permanent Green, knocked back with Yellow Ochre, keeps this area sunlit and bright while a ground of green will blend in with trees when they’re painted. She uses a bigger brush for the foreground colours that are more saturated and spatters paint to distract eye from hard edges. When this is dry, she paints a layer on top adding Cerulean Blue to the green to exaggerate reality slightly. Once the sky is dry Kate starts work on trees. She spatters and stipples the paint to achieve the effect of soft, fluffy edges on the trees. Getting the right shade of green can be tricky, says Kate, and Hookers Green is an option. For the smaller trees, Kate uses a round brush to blob the paint on, adding a darker colour in middle of the tree. Here, granulation of paint enhances the effect. She adds a tiny bit of French Ultramarine to darken the green further. Foreground depth, finishing off Kate decides to put shadow undertones into the foreground to the bottom half of the painting. To do this she mixes Burnt Umber and Quinacridone Purple, creating a clear, nice dark. Using a big flat brush she paints it across the foreground noting that it may look drastically dark, but the paint sinks in and you can put more colour over the top. Next Kate adds more green to the foreground shadow, keeping the green bright but tempering it with Burnt Sienna. The more opaque the colour the more it sits forward in the painting so she recommends using it to your advantage. The final step is to rub off the masking fluid from the foreground, applied at the outset, to create the grasses. Kate adds more detail with thick Yellow Ochre mixed with white gouache. She also use gouache to create white or pale highlights. Creating the effect of cow parsley is laborious takes time to do, but is worth the effort. To do this Kate uses cotton buds to spatter gouache, a creamy white colour mixed dirty water. With grateful thanks to Kate for an inspirational, enjoyable and educational demo.
0 Comments
Leave a Reply. |
WelcomeRead about our latest activities and initiatives here! Archives
February 2025
Categories
All
|
- Home
-
Galleries
- Workshops >
- Challenges >
-
Members' Galleries
>
- Richard Adams
- Ken Baldy
- Keith Bennet
- Graham Brewster
- Victoria Cleverly
- Sarah Clover
- Dave Cooper
- Chris Crosby
- Margaret Gray
- John Harris
- Jacqui Matthews
- Vanda McCann
- Graeme McFaull
- Karen McGreevy
- Glyn Overton
- Sally Parsons
- Linda Ridler
- Karen Road
- Kay Smith
- Joy Tickell
- Jane Tucker
- Elspeth Wales
- Tracy Warne aka Maggie
- Angela Weir Martin
- Mike Wilson
- Exhibitions
- News/Blog
- Membership
- Events
- Contact
Site powered by Weebly. Managed by netnerd.com


 RSS Feed